No products in the cart.
Camaro 2010-2015 ZL1 style front bumper conversion
£799.99 Original price was: £799.99.£719.99Current price is: £719.99.
Out of stock
SKU: CA5GZL1F Categories: Chevrolet, CAMARO 5TH GENERATION
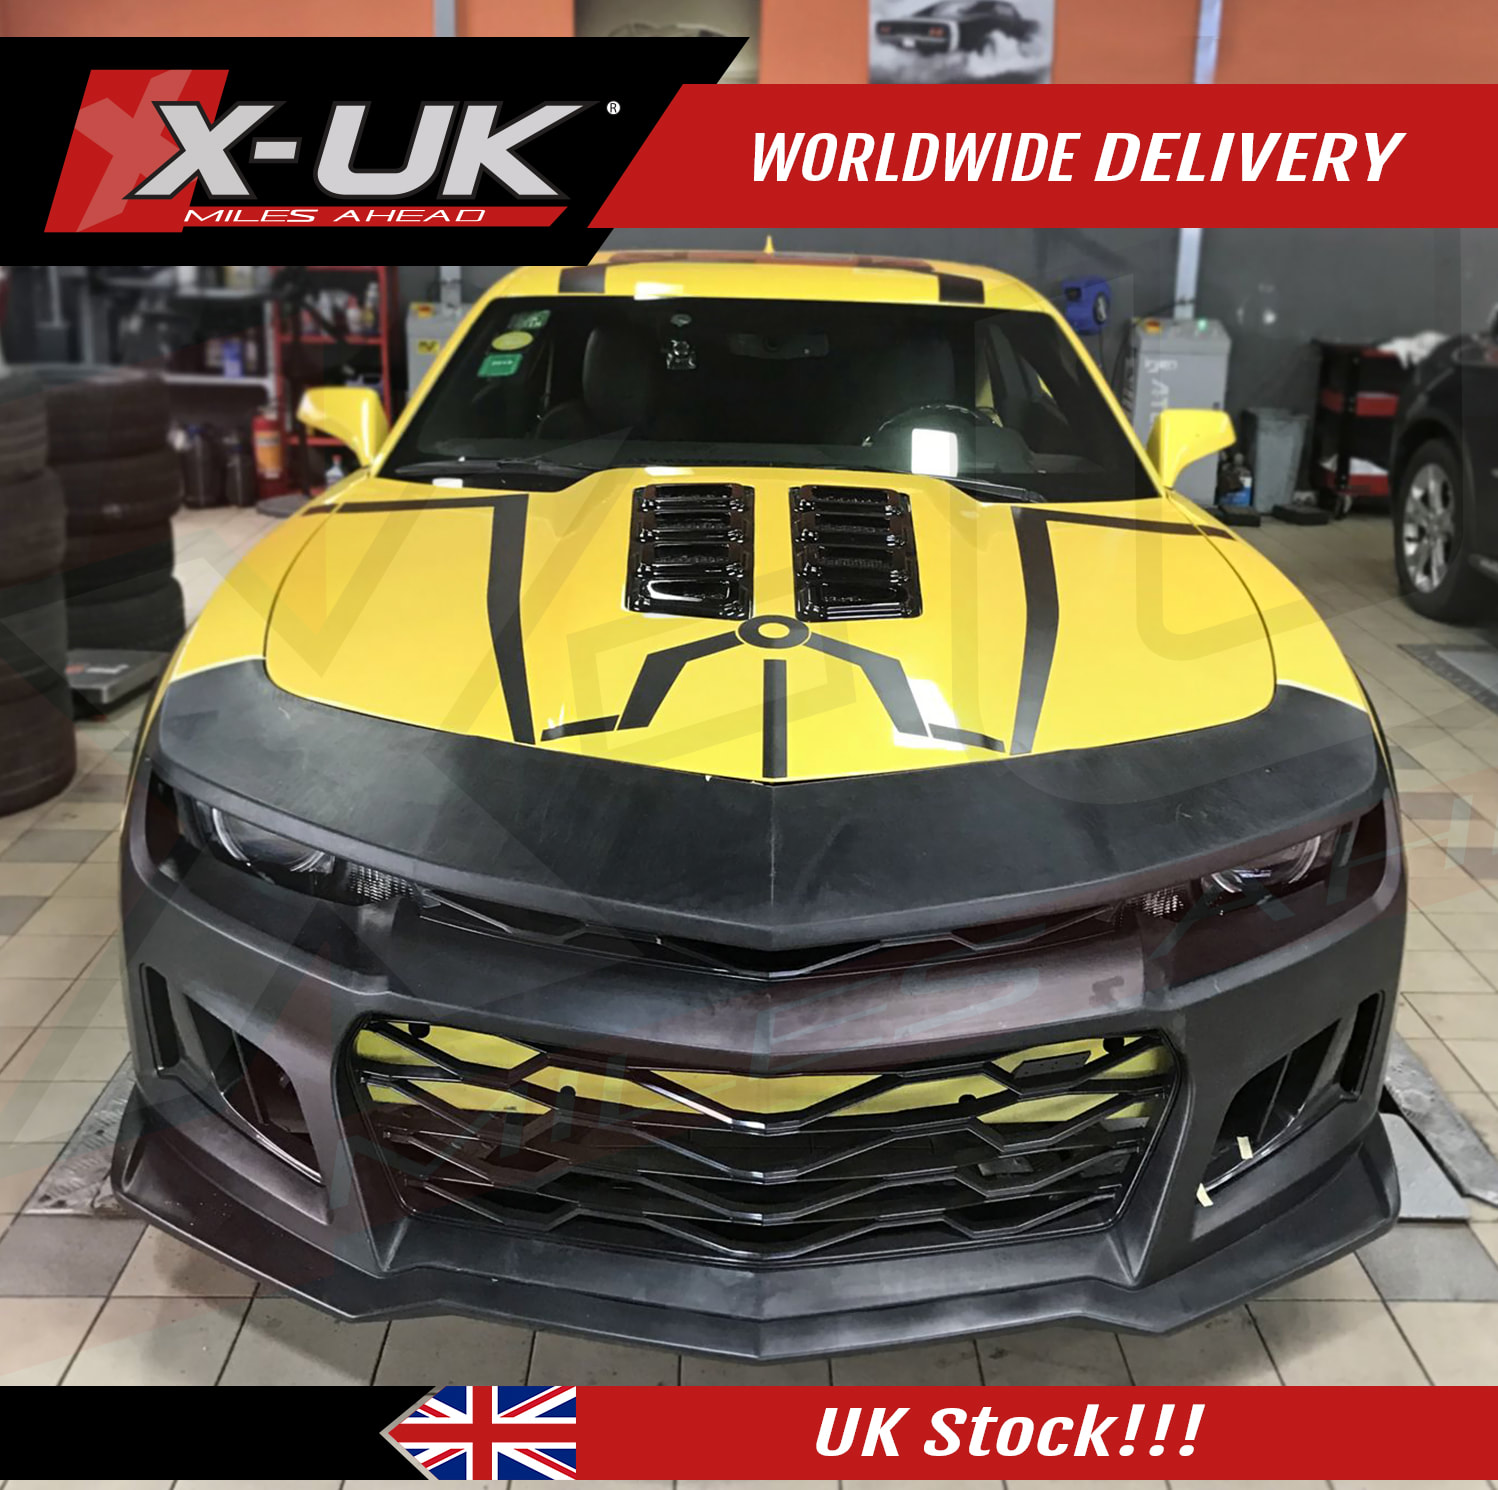
Upgrade the front end of your Camaro 2010-2015 with our ZL1 style front bumper conversion. Transform your 5 Gen Camaro into the 6 Gen effortlessly and embrace the distinctive style of our ZL1 front bumper conversion kit.”
ITEM DESCRIPTION:
- Our ZL1 style front bumper upgrade for Chevrolet Camaro 2010-2015 is manufactured from PP Plastic (polypropylene).
- It comes unpainted.
- Upgrade the old shape front bumper 5th Generation “2010-2015” into the new shape 6th Generation ZL1 style.
COMES WITH:
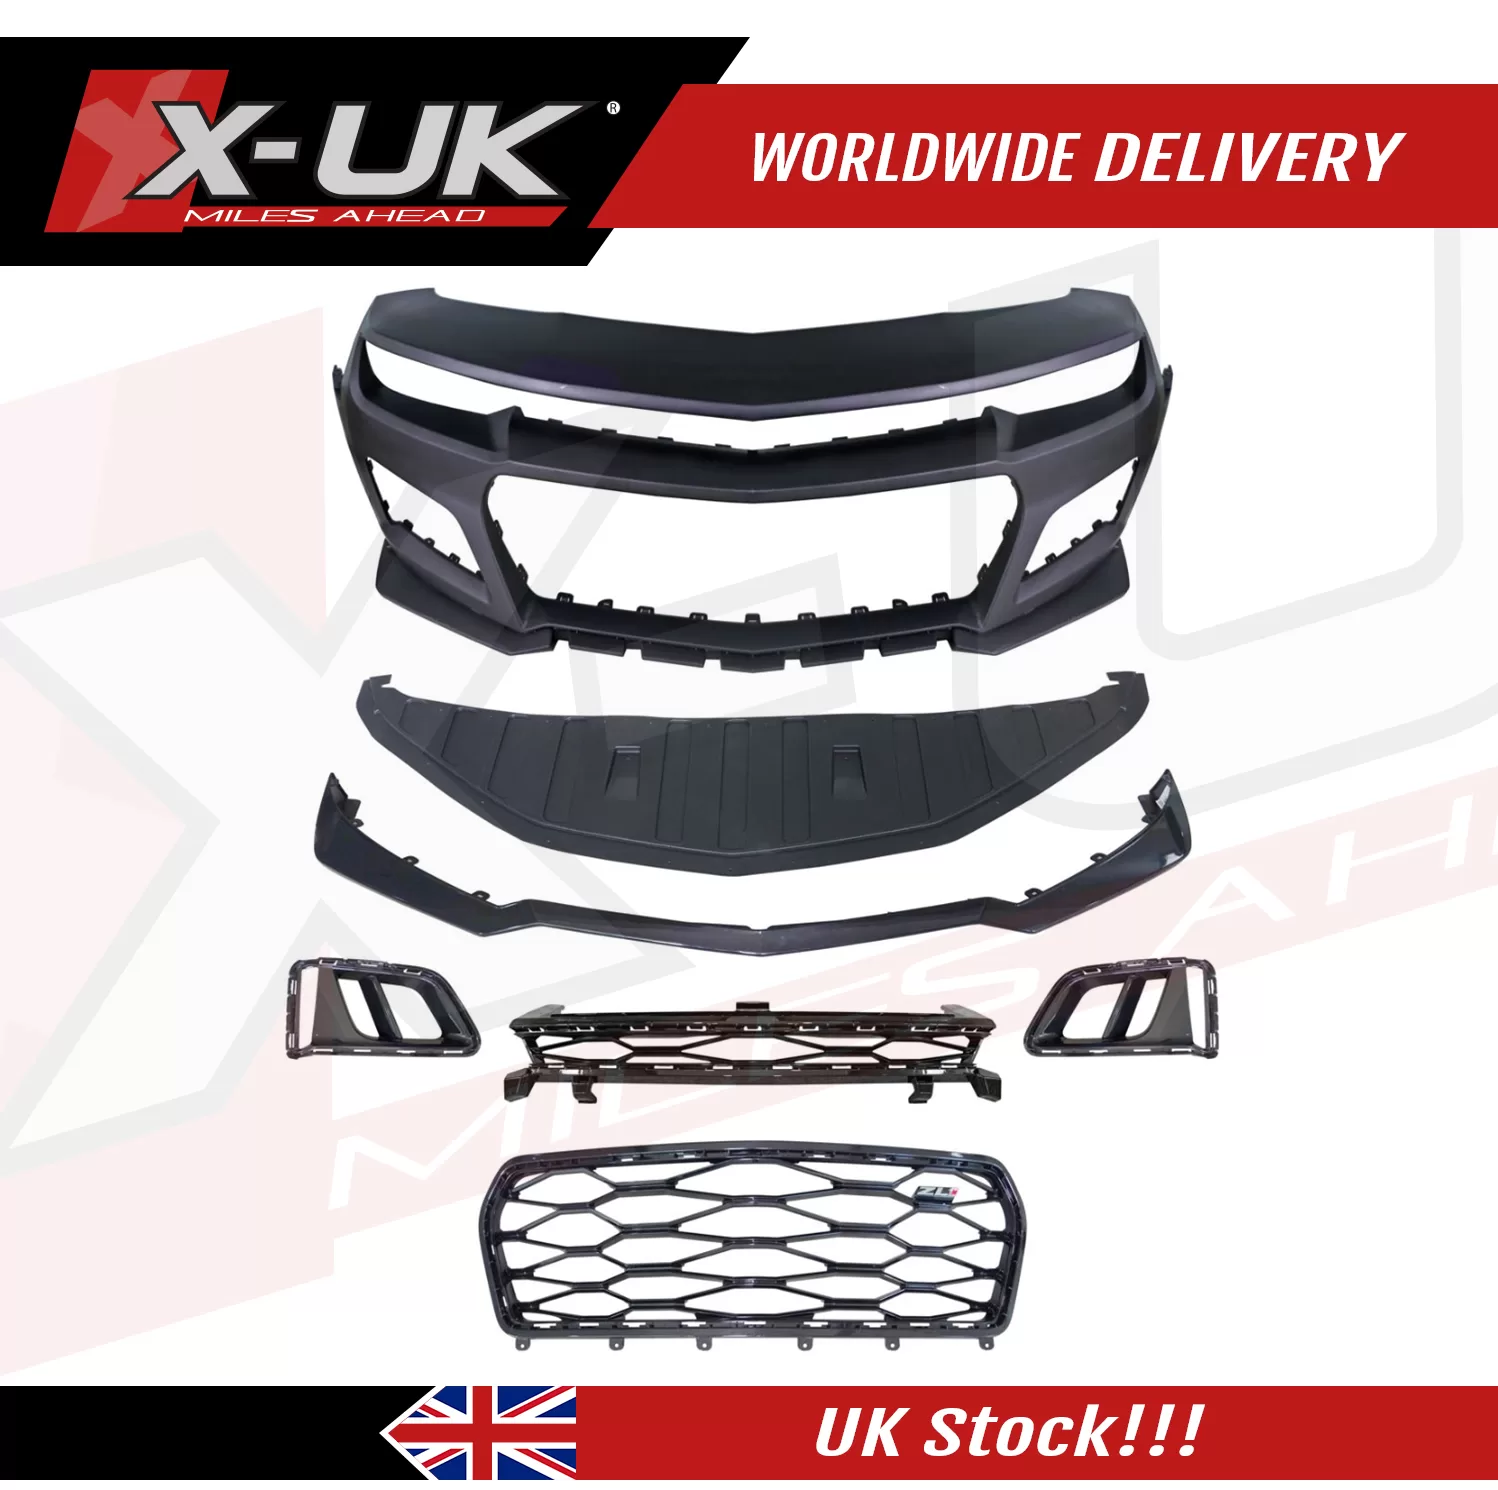
- Bumper skin “unpainted”.
- Front grill “unpainted”.
- Bottom grill “unpainted”.
- A pair of Side grills “unpainted”.
- Bottom lip “unpainted”.
- Undertray.
INSTALLATION:
1. Safety Precautions:
– Ensure your Chevrolet Camaro is parked on a level surface, and engage the parking brake for added safety.
2. Raise the Vehicle:
– Safely lift the front of the car using a jack and secure it with jack stands, providing enough clearance to work comfortably underneath.
3. Remove the OEM Front Bumper:
– Use a socket wrench and screwdriver to carefully remove the bolts and fasteners securing the OEM front bumper. Follow the specific removal instructions outlined in your vehicle’s service manual.
4. Disconnect Wiring and Components:
– Disconnect any wiring harnesses, sensors, and fog lights attached to the OEM bumper. Take note of their placement for reinstallation.
5. Detach the OEM Bumper:
– Once all bolts and connections are removed, gently detach the OEM front bumper from the vehicle. Set it aside in a safe location.
6. Prepare the ZL1 1LE Style Front Bumper:
– Inspect the ZL1 1LE style front bumper body kit and ensure all components are present. Align the new bumper with the mounting points on the vehicle to verify fitment.
7. Install the ZL1 1LE Style Front Bumper:
– Carefully position the ZL1 1LE style front bumper in place, aligning it with the mounting points. Begin securing it by hand-tightening bolts and fasteners.
8. Secure and Adjust:
– Use the appropriate tools to securely fasten the ZL1 1LE style front bumper to the vehicle. Ensure proper alignment and make any necessary adjustments.
9. Reconnect Wiring and Components:
– Reconnect the wiring harnesses, sensors, and fog lights to the new bumper, following the notes made during the removal process.
10. Lower the Vehicle:
– Carefully lower the front of the vehicle from the jack stands.
11. Final Inspection:
– Perform a thorough visual inspection to confirm the ZL1 1LE style front bumper is securely installed, aligned correctly, and all components are in place.
12. Test Drive:
– Take your Chevrolet Camaro for a short test drive to ensure the ZL1 1LE style front bumper performs as expected.
- We strongly recommend professional installation by experienced technicians who are well-versed in automotive upgrades.
- For any additional questions or assistance, don’t hesitate to contact our dedicated support team. We’re here to help you make the most of your automotive upgrade experience.
FITMENT:
- Chevrolet Camaro “5th generation” 2010-2015.
DELIVERY:
- We deliver worldwide.
- For swift delivery, please place your order before 2:00 pm, ‘UK local time,’ and we’ll dispatch it on the very same day. Alternatively, if you place orders after 2:00 pm, we will promptly process and send them out on the next working day, ensuring a seamless shopping experience for you.
- If you want an exact delivery price, please email us at xenonzuk@gmail.com with your full postal address and we will give you a quotation.
| Weight | 20 kg |
|---|---|
| Dimensions | 190 × 58 × 80 in |
Reviews
There are no reviews yet.
Only logged in customers who have purchased this product may leave a review.
Related products
£1,674.99
£249.99

