No products in the cart.
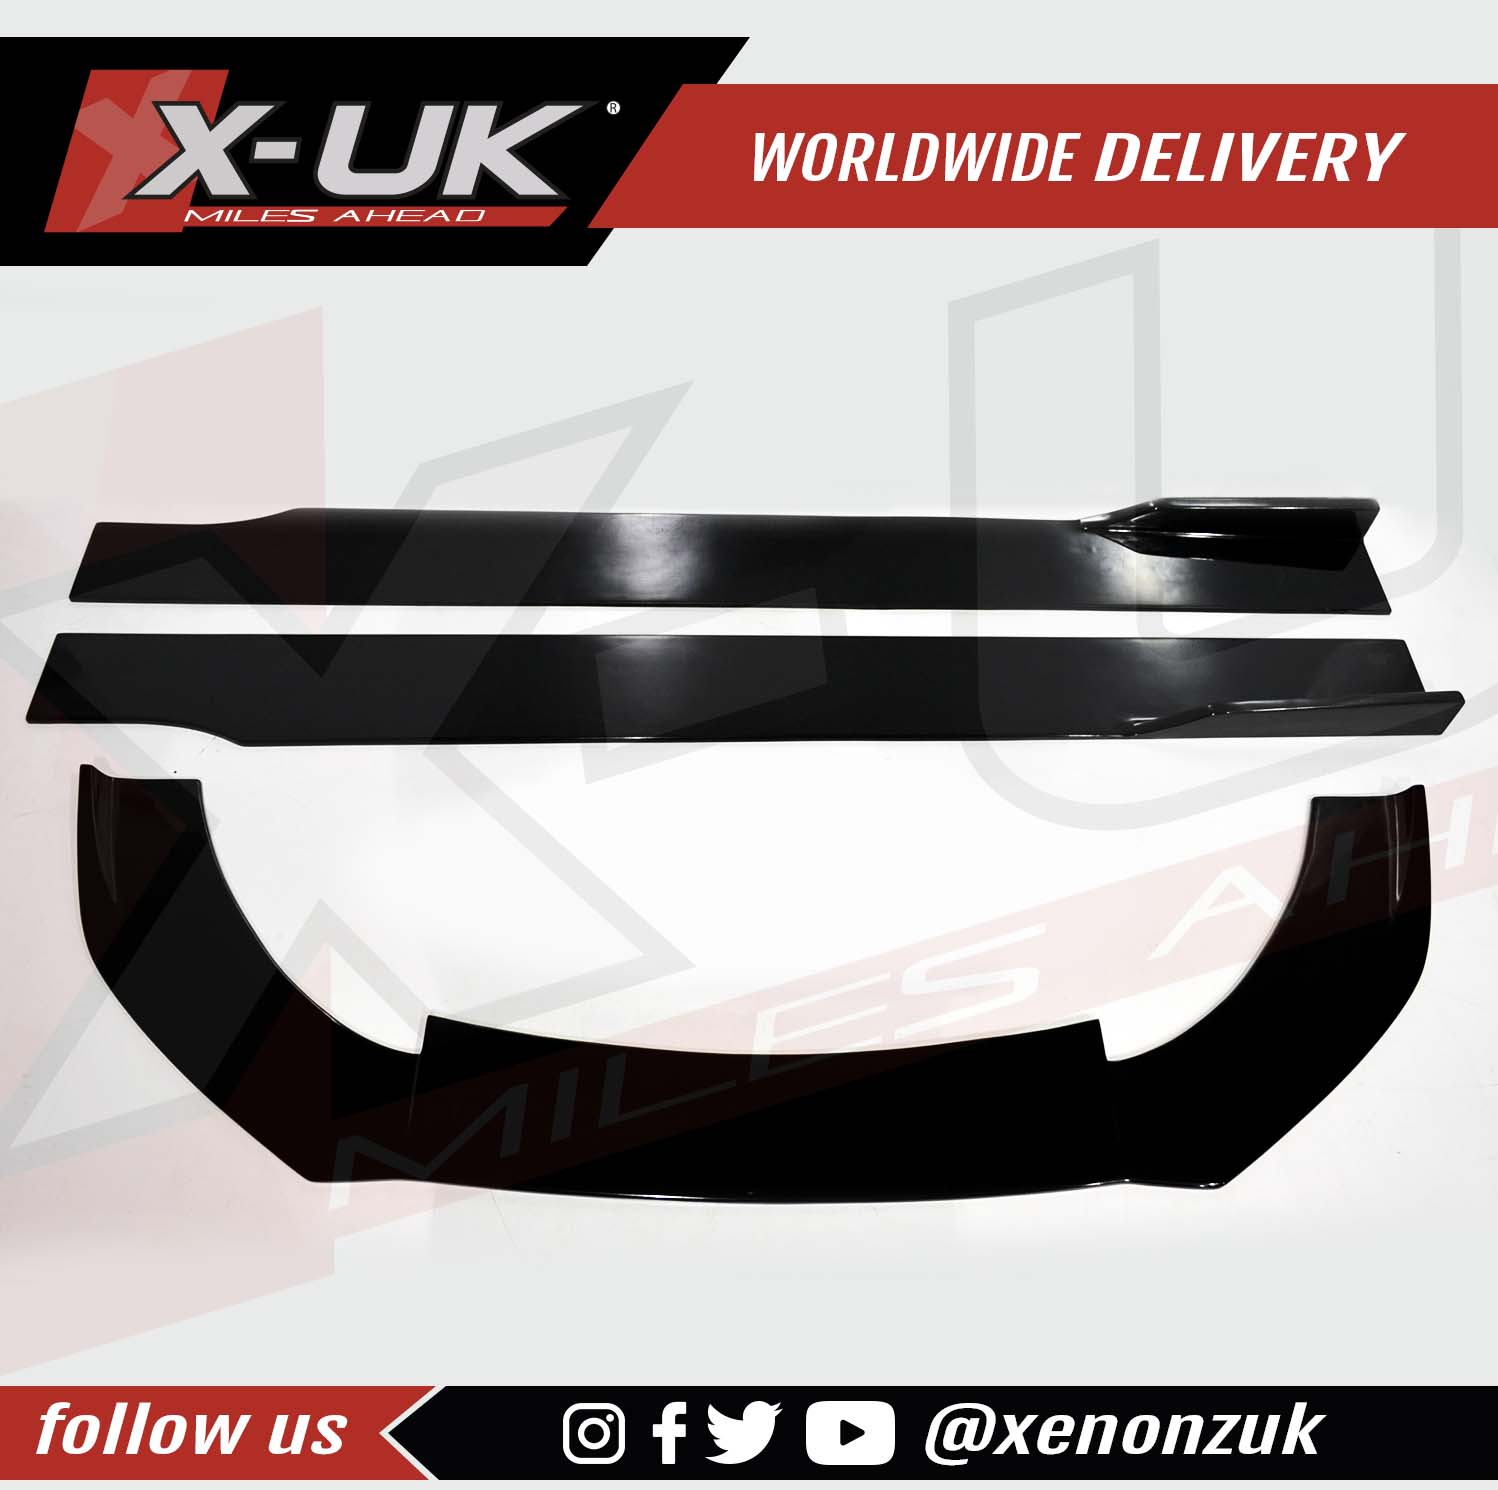
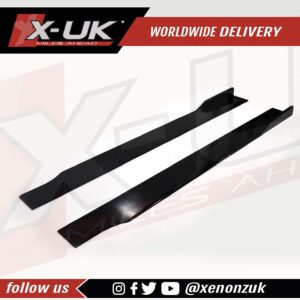
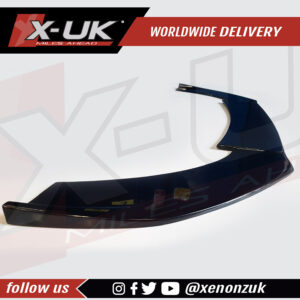
Audi A4 S4 RS4 2008-2012 B8 black FRP lip kit extension splitter side skirts
£634.99
SKU: A4LIPKIT Categories: Audi A4 / S4 "B8" 2008-2012, Front Splitter / Lip Kit / Side Skirts
Audi A4 body kit. Upgrade your Audi A4 S4 RS4 2008-2012 B8 with our black FRP lip kit extension splitter side skirts.
ITEM DESCRIPTION:
- Our Audi A4 body kit lip and side skirts extensions for the Audi A4 S4 and RS4 B8 are manufactured in-house from high-grade FRP (fiber reinforced plastic).
- Finished in black FRP “Please be aware that the finish on our lip kit is not gloss black paint, however, if you are happy with the finish you can install them, otherwise you can paint them.
- Before buying, please check that the measurements of your car are compatible with the measurements of our lip kit.
ITEM SPECIFICATIONS:
Front lip:
- Length: 182 cm / 71.65 inch.
- Width: 53 cm / 20.86 inch.
Side skirts:
- Length: 202 cm / 79.13 inch.
- Width: 20 cm / 7.87 inch.
COMES WITH:
- 1 x Front lip.
- 2 x Side skirt splitters.
Please Note: This item is custom-made specifically to order (“made to order”). Due to its unique nature, special items are excluded from our return and refund policy (“Non-refundable”).
FITMENT:
Front bumper:
- It will fit our X-UK A4 / S4 to RS4 2008-2012 front bumper conversion.
Side skirt lips:
- 2008-2012 Audi A4 B8 Saloon / Estate.
- 2008-2012 Audi S4 Saloon / Estate.
- Audi RS4 2008-2012.
INSTALLATION:
1. Prepare the Area: Park the vehicle on a flat surface and engage the parking brake for stability.
2. Clean the Surface: Thoroughly clean the area along the bottom edge of the side skirts where the extensions will be attached. Use rubbing alcohol or a mild detergent to remove any dirt, grease, or residue. Ensure the surface is dry before proceeding.
3. Position the Side Skirts: Place the black FRP lip kit extension splitter side skirts against the existing side skirts. Align them properly to ensure they fit seamlessly and follow the vehicle’s contours.
4. Mark Attachment Points: With the side skirts properly positioned, mark the areas where screws will be inserted to secure the extensions to the side skirts.
5. Drill Pilot Holes: Use a drill with an appropriate-sized drill bit to create pilot holes at the marked attachment points. These holes should be slightly smaller than the screws to provide a snug fit.
6. Apply Silicone Adhesive: Apply a bead of automotive silicone adhesive along the backside of the extensions, especially around the edges that will be in contact with the side skirts. This adhesive will provide additional support and prevent moisture from seeping in.
7. Secure the Side Skirts: Align the drilled holes in the extensions with the pilot holes on the side skirts. Insert screws through the holes and tighten them using a screwdriver. Be cautious not to overtighten the screws.
8. Clean Up Excess Adhesive: Wipe away any excess silicone adhesive that might have squeezed out from between the extensions and the side skirts using a clean microfiber cloth.
9. Allow for Cure Time: Follow the instructions provided with the automotive silicone regarding curing time. Typically, it’s advisable to allow the adhesive to cure for at least 24 hours before driving.
- We strongly recommend professional installation by experienced technicians who are well-versed in automotive upgrades.
- For any additional questions or assistance, don’t hesitate to contact our dedicated support team. We’re here to help you make the most of your automotive upgrade experience.
Please Note: This item is custom-made specifically to order (“made to order”). Due to its unique nature, special items are excluded from our return and refund policy (“Non-refundable”).
DELIVERY:
- We deliver worldwide.
- For swift delivery, please place your order before 2:00 pm, ‘UK local time,’ and we’ll dispatch it on the very same day. Alternatively, if you place orders after 2:00 pm, we will promptly process and send them out on the next working day, ensuring a seamless shopping experience for you.
- If you want an exact delivery price, please email us at xenonzuk@gmail.com with your full postal address and we will give you a quotation.
| Weight | 15 kg |
|---|---|
| Dimensions | 190 × 58 × 52 in |
Reviews
There are no reviews yet.
Only logged in customers who have purchased this product may leave a review.
Related products
Sale!
Sale!
Sale!
£519.99 – £849.99


